GitLab and Riviera-PRO Integration
This app note provides the information required to connect a GitLab project with Continuous Integration (CI) to Riviera-PRO to simulate the RTL project. To make the process clear, we'll go over the important steps. Let's start with the GitLab structure.
What is GitLab
GitLab is a web-based DevOps tool which provides Continuous Integration (CI), Continuous Delivery and Continuous Deployment (CD). GitLab enables users to use it in two different models. The SaaS (software-as-a-service) version which is available at GitLab.com or as a self-managed on-premise instance. Installation and configuration of the second model is described in GitLab Instance Installation and Configuration. The SaaS version can also be used with external Git repositories so you don't even have to change your Git provider in order to use GitLab CI/CD. The only requirement to run CI/CD is the presence of a special GitLab CI YAML configuration file. The gitlab-ci.yml file is the YAML file where you configure specific instructions for the GitLab CI/CD.
In the gitlab-ci.yml file, you can define:
The scripts you want to run.
Other configuration files and templates you want to include.
Dependencies and caches.
The commands you want to run in sequence and those you want to run in parallel.
The location to deploy your application to.
Whether you want to run the scripts automatically or trigger any of them manually.
Pipeline
The scripts are grouped into jobs and jobs run as part of a larger pipeline. You can group multiple independent jobs into stages that run in a defined order. The CI/CD configuration needs at least one job that is not hidden. Pipelines are the top-level component of continuous integration, delivery, and deployment.
Jobs, which define what to do. For example, jobs that compile or test code.
Stages, which define order of groups of jobs. For example, stages that run tests after stages that compile code.
Runner
GitLab Runner is an application that works with GitLab CI/CD to run jobs in a pipeline. You can choose to install the GitLab Runner application on an infrastructure that you own or manage. Alternatively, you can use the runners on the cloud which is part of the GitLab SaaS infrastructure. For different kinds of jobs, you can assign multiple runners that have different operating systems and tools. They can also use different methods to execute the jobs such as a direct execution in a host shell, Docker container, or Kubernetes cluster. GitLab Runner is open-source and is written in Go. It can run as a single binary; no language-specific requirements are needed. For the purposes of this Application Note, we will be using a runner hosted on a local machine.
Prerequisites
The registered account on GitLab.com or self-hosted GitLab instance installed on your machine. For details on local installation, refer to GitLab Instance Installation and Configuration.
The registered GitLab runner configured to use with the shell executor. Since registration of the GitLab runner looks the same for both the on-premise and SaaS models, please follow the runner installation section of GitLab Instance Installation and Configuration and pick the shell executor configuration variant.
Creating a GitLab project
Visit the GitLab.com or the main page of a self-hosted GitLab instance.
Create a blank project
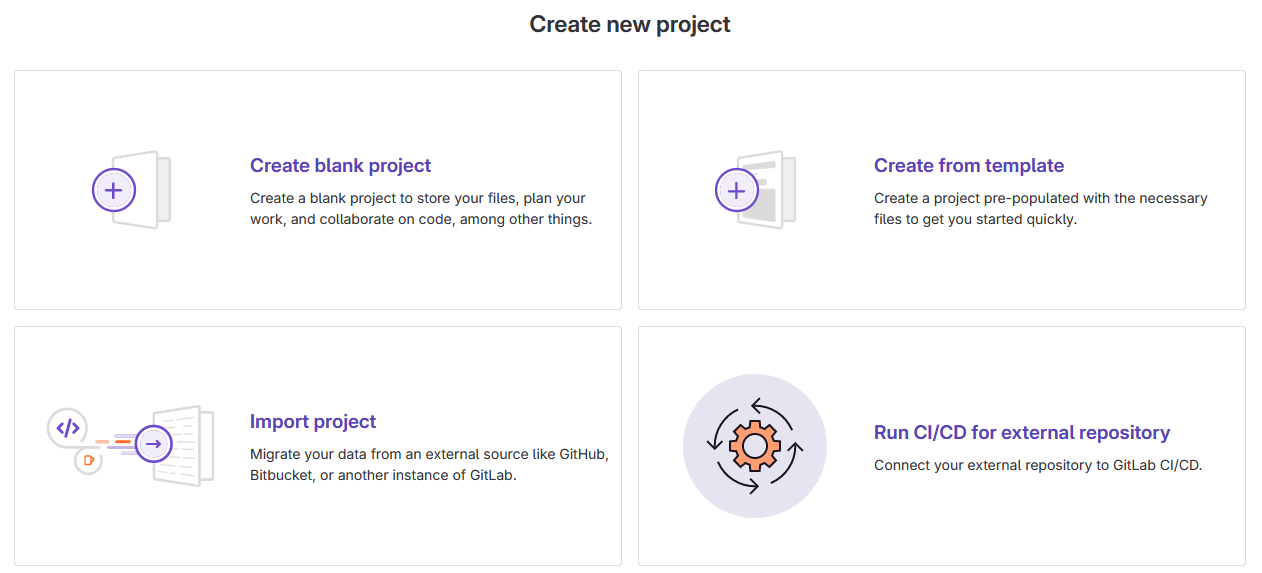
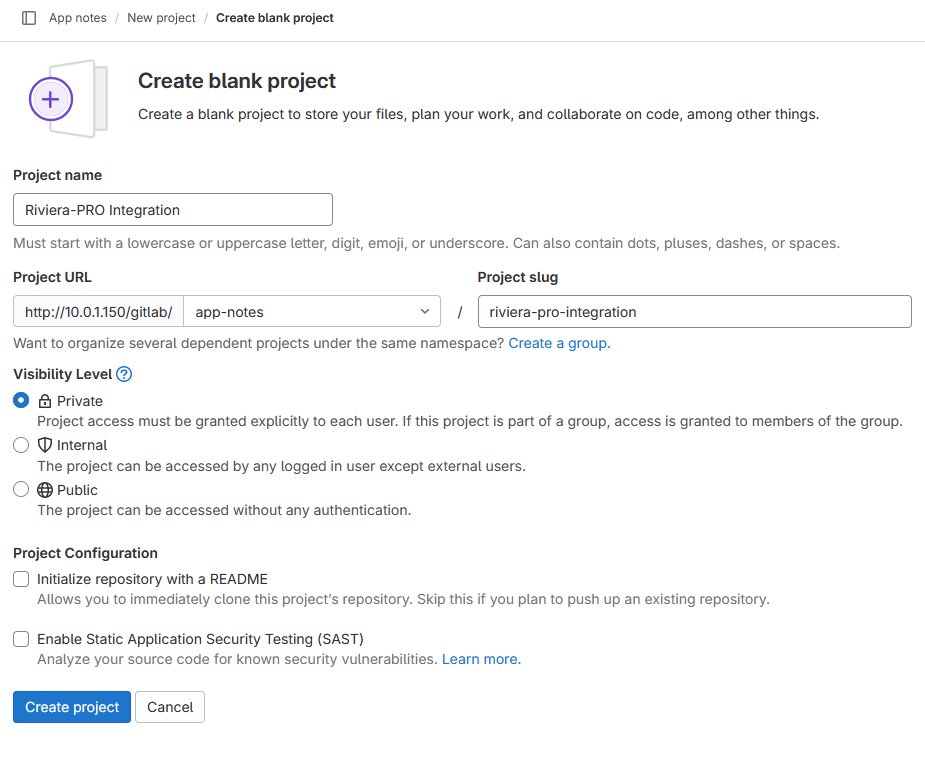
Name the project and either make it public or private depending on your preference. Ensure that the Initialize repository with a README option is cleared and click the Create project button.
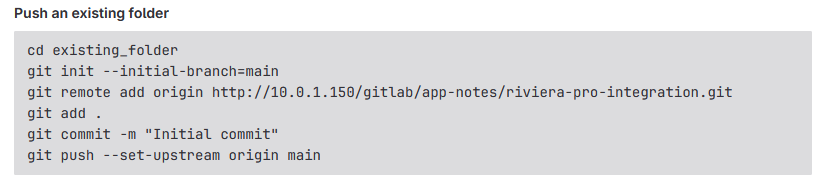
Add the project files to the GitLab project. On the empty project homepage, GitLab provides instructions for uploading files in three different cases:
Creating a new (empty) Git repository
Pushing an existing folder
Pushing an existing Git repository
For this app note, we will be using a code coverage sample design which can be found in the examples/coverage/coverage_database/testplan_rank subdirectory of the Riviera-PRO installation. Copy the sample to a directory with the write permissions. Choose the second option since project files already exist but are not stored as Git repository:
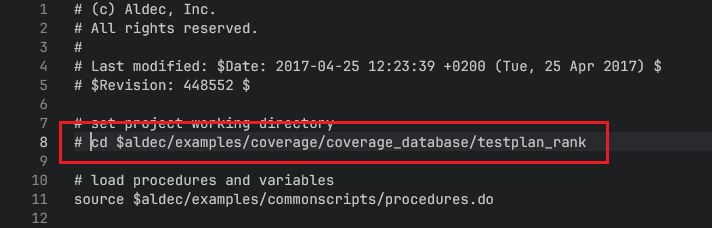
Next, modify the working directory in the default macro file. To do this, open the file src/runme.do in web editor:
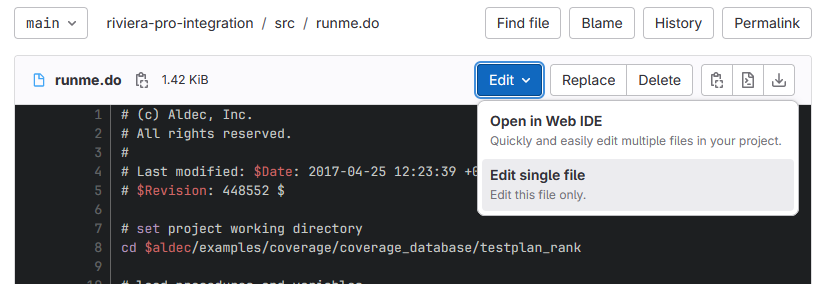
Comment out the line containing the cd command and commit the changes:
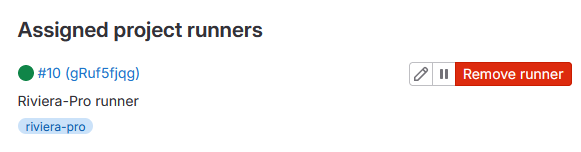
Before adding pipeline configuration file, make sure that the runner is working fine. To do this, check Settings | CI/CD and expand the Runners section. If there is a green sign next to your runner's name at the bottom of the page, it is working.
If there is a black triangle next to your runner's name, ensure that you followed all steps from GitLab Instance Installation and Configuration.
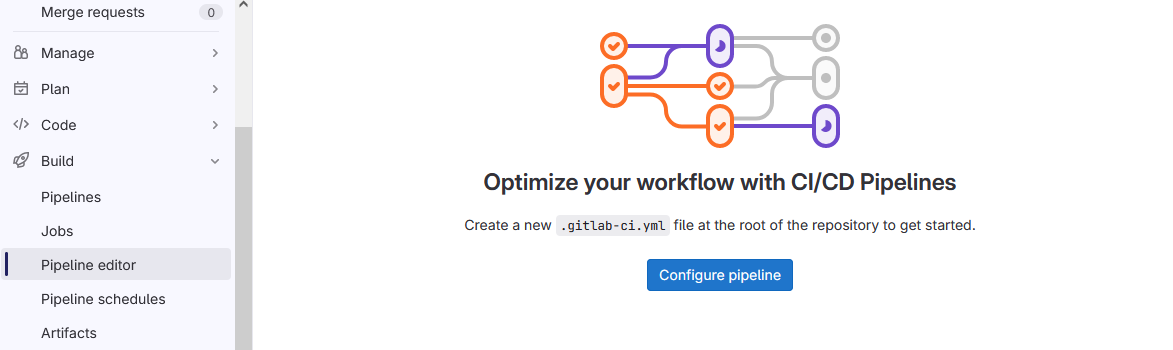
Next, create the gitlab-ci.yml pipeline configuration file by selecting Build | Pipeline editor and clicking the Configure pipeline button.
Remove the default content and add below stages, jobs, and tags that are based on your project. Riviera-PRO can be launched in the batch mode with the vsimsa -do <macro_file> command. This command needs to be added in the build-job section of the script.
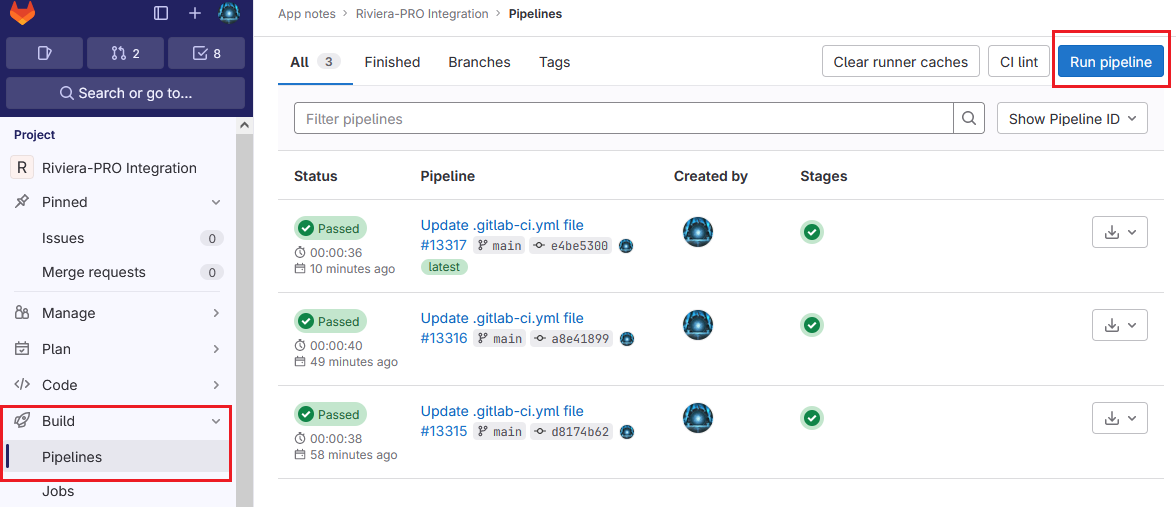
stages:        # List of stages for jobs, and their order of execution
  - test

test-job:      # This job runs in the test stage, which runs first.
  stage: test
  tags:
    - riviera-pro
  artifacts:
    paths:
      - rank.html
      - rank_files/
      - results.html
      - results_files/
  script:
    - echo "Executing simulation..."
    - vsimsa -do src/runme.do
    - echo "Simulation complete."
After adding gitlab-ci.yml file, the pipeline should be triggered automatically, but there is also possibility to run it manually. To do that, select the Build tab from the left side bar and click the Pipelines option. Then, click Run pipeline on the top right.
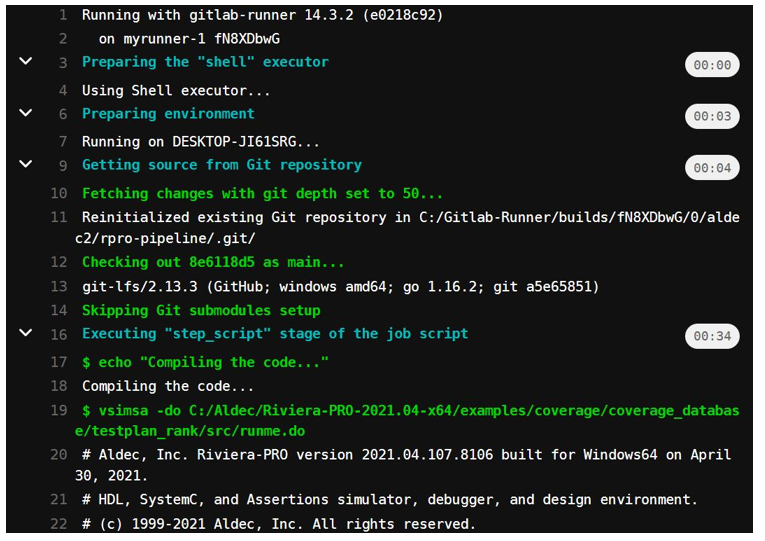
Once the run is done, we can open the console logs by clicking the Pipeline ID and then the test-job. Here is a part of the project log:
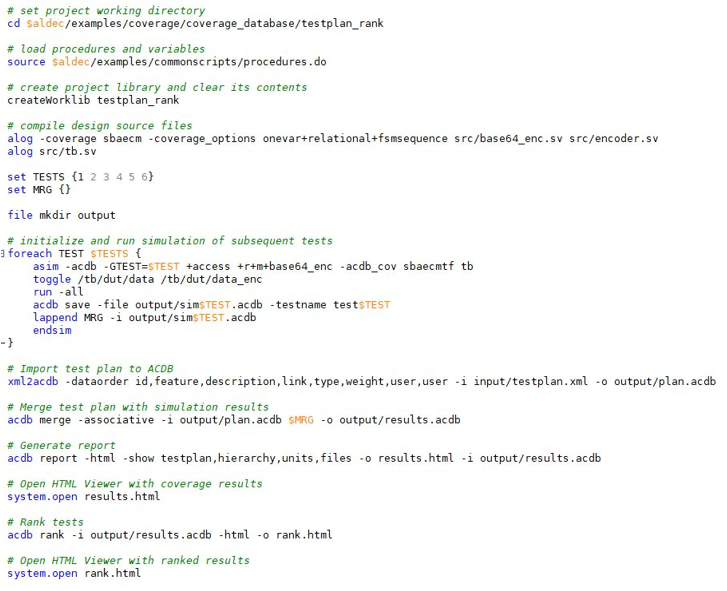
The design example chosen for this app note provides code coverage and test ranking features which are covered briefly in the following sections. The runme.do file consists of multiple commands to compile, initialize, and simulate the tests, generate the report, and generate the test ranking. This file is shown in the image below:
If you'd like to visualize the code coverage results in GitLab merge requests, refer to Code Coverage Visualization in GitLab.
Test Ranking
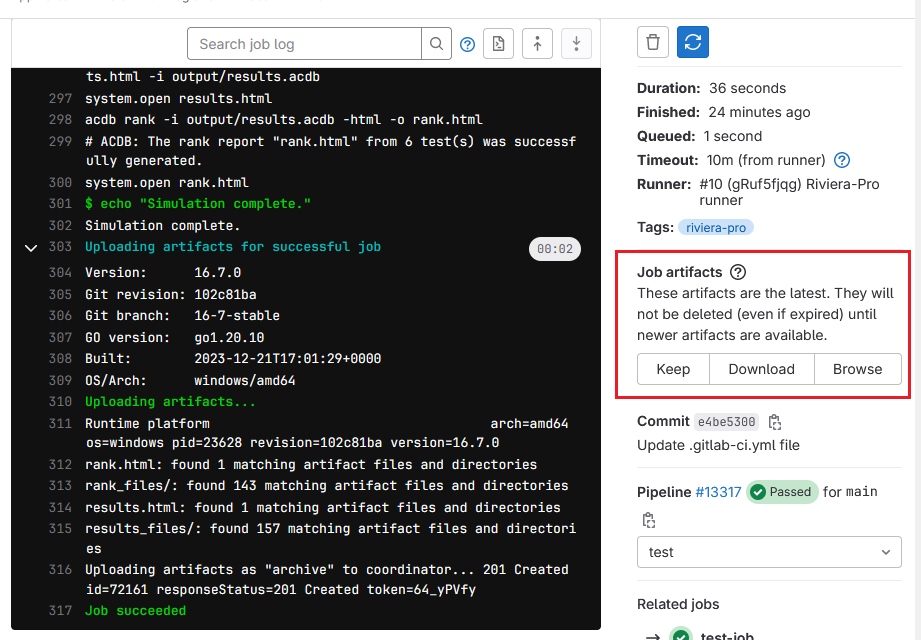
The coverage results in Riviera-PRO are saved into an ACDB database. These results can be ranked by using the acdb rank command that classifies the results based on contribution of tests to total coverage score. The command allows comparing a single coverage result against all others to determine its usability. The test ranking feature enables us to realize if we are doing excessive testing which results in longer simulation time and increase in project costs. The generated reports are kept as artifacts when the job is finished and can be accessed from the right side of the job results page:
Let's look at the test ranking results of the example design that we used in this app note:
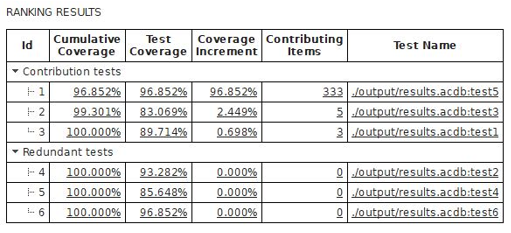
The result shows that only 3 tests are required to achieve 100% code coverage and the rest of the 3 cases are extra. This feature can expedite the simulation process and save time and cost for big projects.
Corporate Headquarters
2260 Corporate Circle
Henderson, NV 89074 USA
Tel: +1 702 990 4400
Fax: +1 702 990 4414
https://www.aldec.com
©2026 Aldec, Inc.