Simulating Nios® II Designs in Riviera-PRO
Introduction
This application note describes the steps to produce an RTL simulation environment with the NIOS® II example design (Hello World), Qsys, and the NIOS II software build tools for Eclipse. This document also provides step by step instructions on RTL simulation in Riviera-PRO.
Requirements
This application note assumes following:
You have the following software installed and licensed:
Altera Quartus® II version 13.0.0 or later and all devices from Altera
Riviera-PRO 2013.06 or later
You have experience using Qsys and have familiarity with the Riviera-PRO simulator.
You have downloaded the example design used in this application note (an351_design.zip). You can download this example design from http://www.altera.com/support/examples/nios2/exm-simulating-niosii.html
You have extracted the example design.
NOTE: The location where you extract the file will be referred to as <project_directory>
Setting and Generating the simulation environment in Qsys
Start the Quartus II Software. Click File | Open Project.
Browse to <project_directory>/an351_design, select an351_project.qpf and click Open.
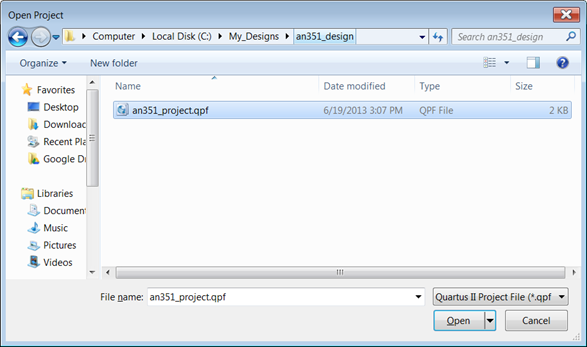
Figure 1: Opening example design
Now open Qsys by clicking Tools | Qsys. Once Qsys is opened it will ask you to open the system file.
Select the niosii_system.qsys file and click Open. This file is located in the <project_direcoty>/an351_design directory.
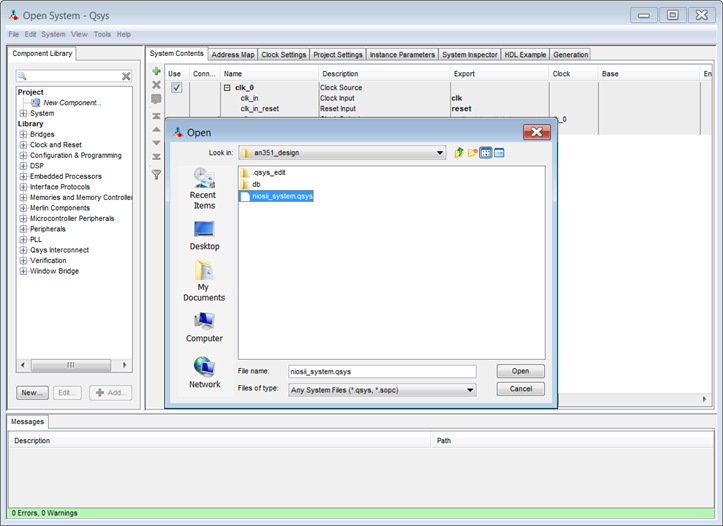
Figure 2: Opening Qsys system file
Click on the Generation tab. Set the following parameters to these values:
Create simulation model – None
Create testbench Qsys system – Simple, BFMs for clocks and resets
NOTE: If you system has exported ports other than clock and reset, choose Standard, BFMs for standard Avalon interfaces
Create testbench simulation model – Verilog
Create HDL design files for synthesis – none
Create block symbol file (.bsf) – Uncheck
Click Generate. Save the system by clicking File | Save once Generation is done.
NOTE: The example design is a complete Qsys system. Make sure that your Qsys system is completed before generating simulation models.
Generated files include:
rivierapro_setup.tcl (<project_directory>/an351_design/niosii_system/testbench/aldec)
Qsys system testbench file and Memory initialization files (.mif) (<project_directory>/an351_design/niosii_system/testbench/niossii_system_tb/simulation)
Creating Nios II software
Open Nios II Software Build Tools for Eclipse version Indigo Service Release 2 (13.0 or later)
Click File | New and select Nios II Application and BSP from Template.
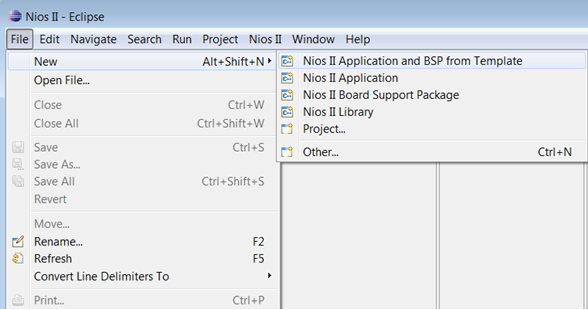
Figure 3: Creating new application
Select the SOPC Information (.sopcinfo) file name by browsing to <project_directory>/an351_design, and then select niosii_system.sopcinfo.
Specify hello_world_an351 as the project name.
Select Hello World from the Templates option and click Finish.
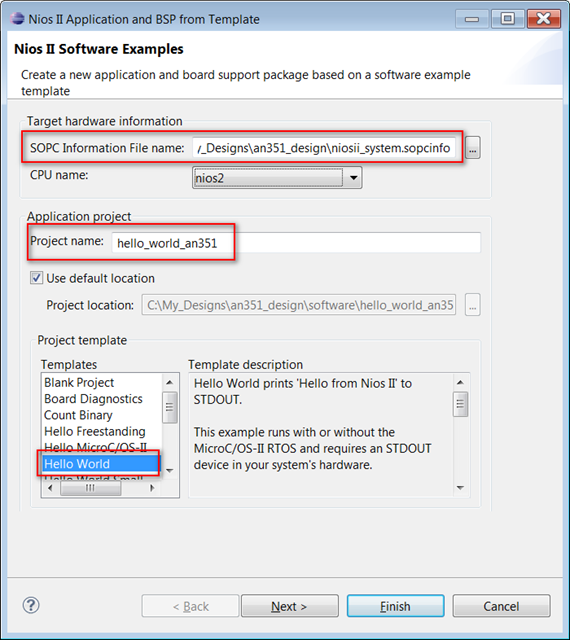
Figure 4: Selecting template
Right-click on hello_world_an351 in the Project Explorer and select Build Project. This step builds the hello_world project and creates all necessary files for simulation.
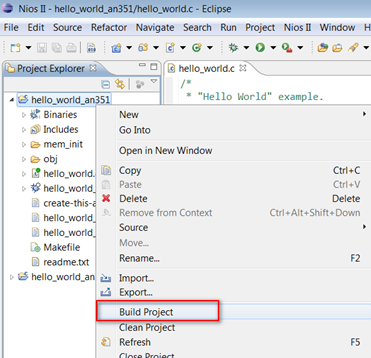
Figure 5: Building Project
Running Simulation in Riviera-PRO
Once the build project is done, right-click on hello_world_an351 in the Project Explorer and select Run As | Run Configurations….
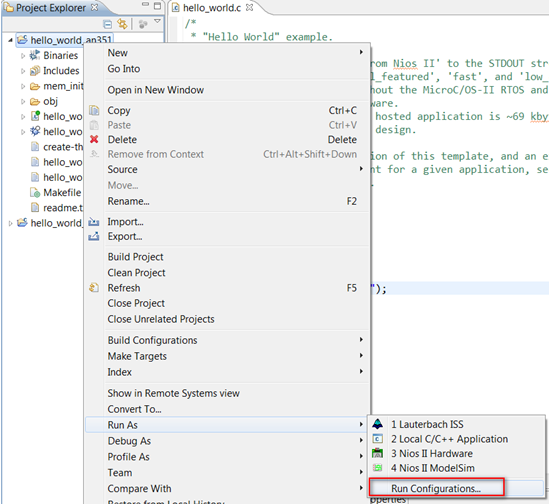
Figure 6: Setting Configuration
In the Run Configuration window, right-click on Nios II ModelSim and select New. This will create a New_configuration sub-tab under Nios II Modelsim.
NOTE: Steps 14 and 15 are required if you are using Nios II SBT for the first time and have never setup a configuration for Riviera-PRO before. Once the configuration is setup for Riviera-PRO, you can run simulation by directly selecting Nios II Mosdelsim from Run As.
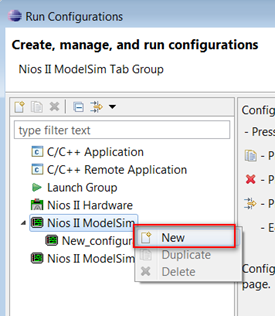
Figure 7: Creating new configuration
In New_configuration, provide the Riviera-PRO executable path. Select Apply and Run.
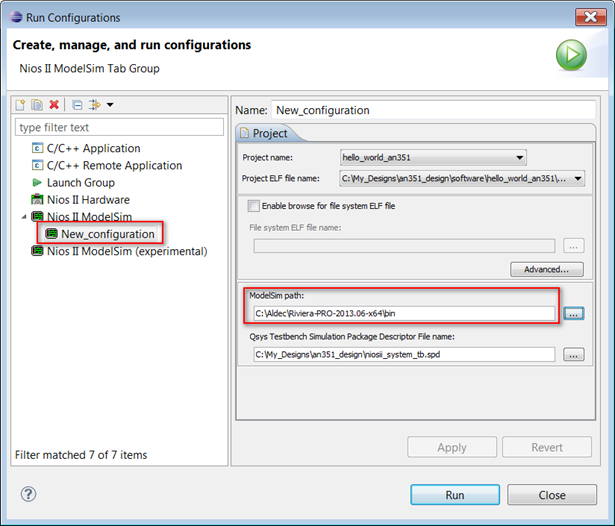
Figure 8: Setting Configuration
The above action will invoke Riviera-PRO and start executing the script. This will result in errors in Riviera-PRO. By default, Nios II SBT starts Riviera-PRO in the wrong directory. The correct directory should be …sim/aldec. It generates simulation scripts for Aldec. Click on the Change Directory button from the Filesystem tab of Riviera-PRO.
NOTE: Because of wrong directory it automatically starts executing script which was created for mentor, this results in error.
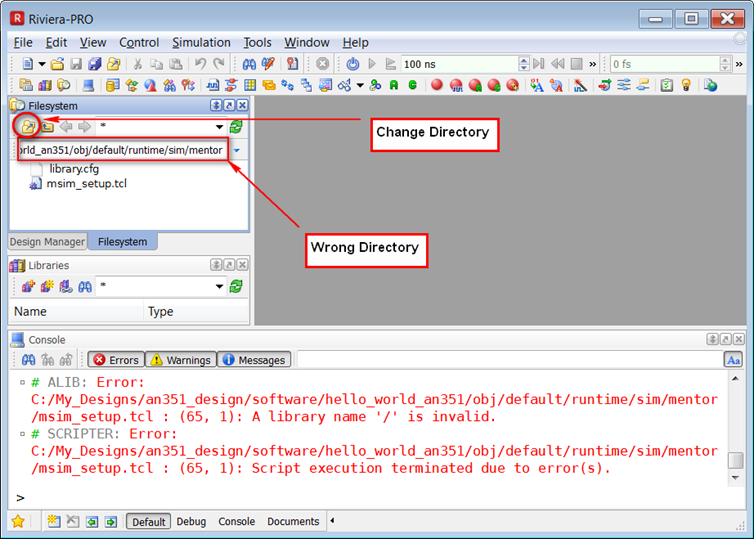
Figure 9: Changing directory
Select the aldec folder as the current directory from the Select a Directory window.
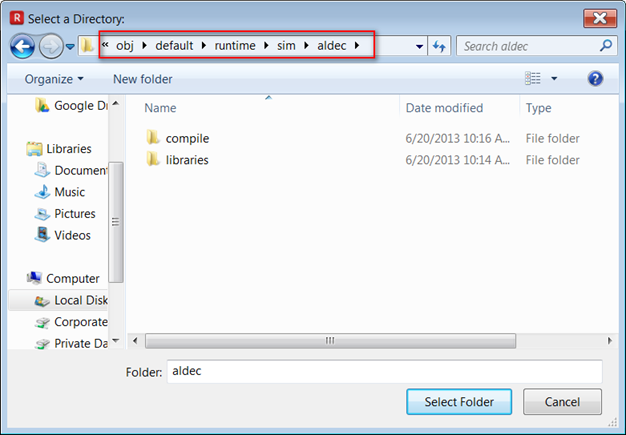
Figure 10: Selecting aldec as current directory
This will set aldec as a current directory. Open the rivierapro_setup.tcl script file and execute it. This will set all necessary variables and will copy all memory files to current directory.
NOTE: Click the Execute button from script editor tool bar.
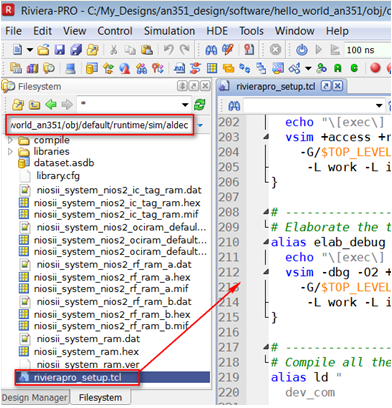
Figure 11: Executing tcl script
Script execution will set aliases which can be run as a command in the Riviera-Pro console for creating libraries (both device and work), compiling libraries, compiling the hello world example source files (Qsys tb system), and initializing simulation (elaboration).
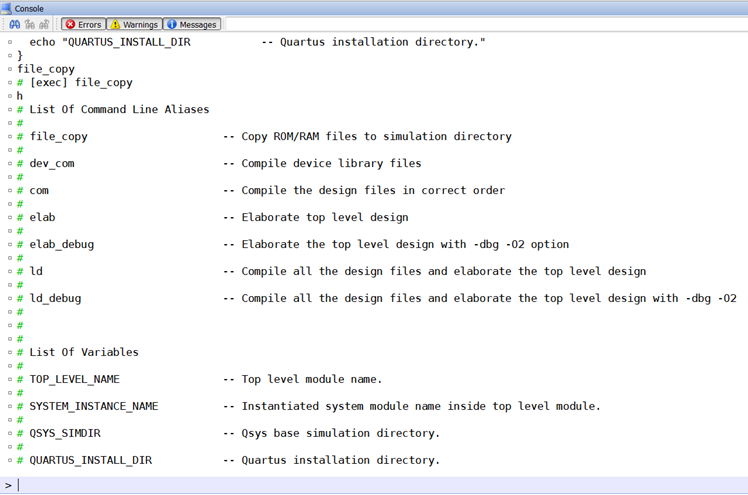
Figure 12: Setting variables and aliases through script
Now let’s start simulation process by compiling device library files. Type dev_com in the Riviera-PRO Console and hit Enter.
NOTE: If the small circle is spinning in top right corner of riviera-PRO that means Riviera-PRO is executing some process.
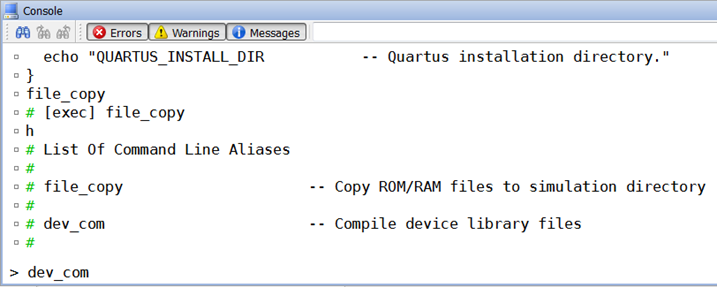
Figure 13: Compiling Device Libraries
Once device libraries compilation is done, type com in the Riviera-PRO Console and hit Enter. This will compile all of your Qsys system tb in different work libraries.
NOTE: You can observe components compiled into libraries by expanding the respective library from the Library Manager in Riviera-PRO.
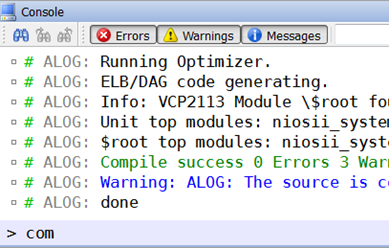
Figure 14: Compiling Qsys tb system
Once compilation of tb system is done, you can start the elaboration of the system using the top level module. This can be done using elab alias command. Type elab in the Riviera-PRO Console and hit Enter.
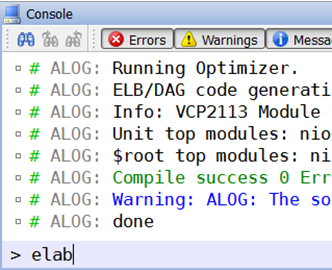
igure 15: Elaborating Design
Once elaboration is done you will see message: ASDB was creates in location…. This means you can now run simulation.

Figure 16: Message showing Elaboration complete
To run the simulation, type run 2ms in the Riviera-PRO Console. This will print the “Hello from Nios II!” message in the Riviera-PRO Console.

Figure 17: Hello from Nios II
Conclusion
Altera Nios II Embedded Processor Designs can be simulated in Riviera-PRO. Please refer to http://www.altera.com/literature/an/an351.pdf for more detailed information about the hello world example and memory initialization files. Please contact Aldec support if you have any questions or difficulty following this application note.
You can observe waveforms in the above simulation. Please refer to http://www.aldec.com/en/support/resources for more detailed information on the Riviera-PRO waveform and other debugging tools.
Corporate Headquarters
2260 Corporate Circle
Henderson, NV 89074 USA
Tel: +1 702 990 4400
Fax: +1 702 990 4414
https://www.aldec.com
©2026 Aldec, Inc.