Starting Active-HDL as Default Simulator in Xilinx Vivado 2017.3 or Earlier
Introduction
This document describes how to start the Active-HDL simulator from Xilinx Vivado™ to run behavioral and timing simulations. This application note has been verified on Active-HDL 10.5, Xilinx Vivado 2017.3, and Active-HDL Simulator 1.12 add-on to Vivado. This integration allows users to run VHDL, Verilog, Mixed, and SystemVerilog (Design) simulations using Active-HDL as the default simulator.
Installing Xilinx libraries in Active-HDL
In order to run the simulation successfully, depending on the design, both VHDL and Verilog simulation libraries for the respective Xilinx Vivado version may have to be installed in Active-HDL. You can check which libraries are currently installed in your Active-HDL version using the Library Manager tool. The tool can be accessed by selecting the Library Manager option from the View menu. Libraries have to be compiled for the Active-HDL version you are using for simulation.
You can obtain libraries in multiple ways:
You can compile Xilinx libraries from sources with the compile_simlib -simulator activehdl command of Vivado.
NOTE: After generating the compiled libraries from Xilinx, they have to be manually attached to Active-HDL. For more information refer to Compiling Xilinx Vivado Simulation Libraries for Active-HDL.
You can also install precompiled libraries:
If you are using the Active-HDL DVD to install the software, during the installation, you will get the option to select and install the Xilinx libraries.
If you have received a web link to download Active-HDL, on the same page you will find the links to download Xilinx libraries.
At any time you can visit the Update Center to download the latest Xilinx libraries at http://www.aldec.com/en/downloads.
Here is the typical sequence you would like to follow to run the Active-HDL from Vivado:
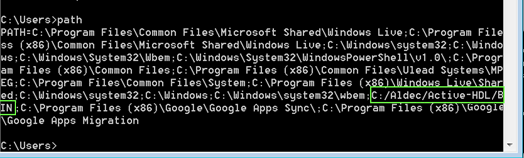
Make sure you have the <Active-HDL_installation_path>/BIN path in your %PATH% environment variable. To confirm that you have the %PATH% variable set correctly, open the windows Command Prompt, type "path", and press ENTER. The result should show the Active-HDL path. If the path is there, go to step 3.
If the Active-HDL installation path is not set, then please add this path in your Environment Variables.
NOTE: If Vivado is already running while you add the path, then you will have to restart Vivado to have your new PATH variable effective inside Vivado.
Select the Xilinx Tcl Store option from the Tools menu, switch to the Installed tab, and make sure that the Active-HDL Simulator plug-in is already installed. If it is not, find the plug-in under the All tab and click the Install button. If the plug-in is already installed, you can update it to the latest version. To do so, click the Update button after refreshing the repository with the Refresh button.
Create or Open a project in Xilinx Vivado Project Manager.
From the Flow Navigator pane, click on the Simulation Settings tab.
Under the Simulation category of the Project Settings window, change the Target Simulator to Active-HDL Simulator.
Here under the Compilation tab, you can pass arguments to the Verilog and VHDL compiler.
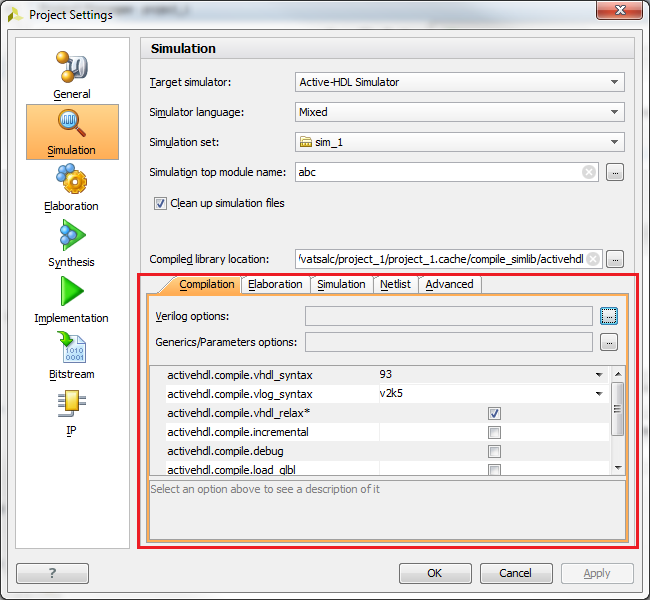
NOTE: You may need to select the activehdl.compile.vhdl_relax checkbox that relaxes some LRM requirements when compiling VHDL files.
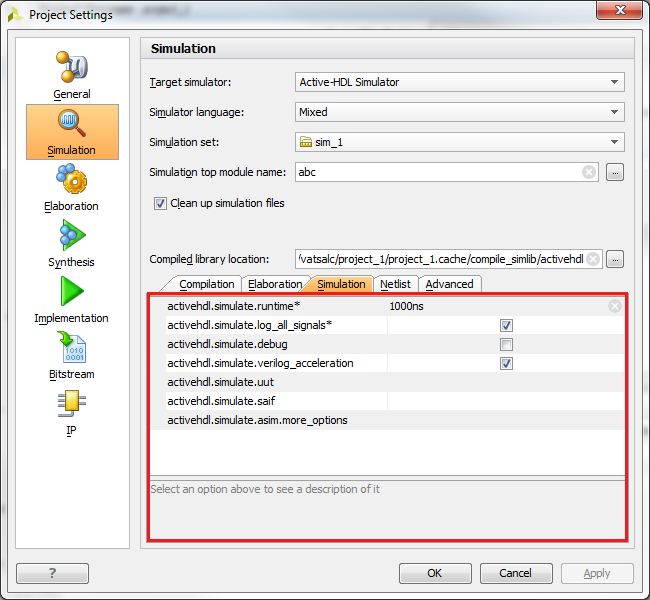
Under the Elaboration and Simulation tabs you can set simulation related arguments e.g. logging all signals to simulation database, accessing signals for waveform, simulation run time.
Once all options are set according to your requirements, click OK.
NOTE: If a version of Active-HDL was updated between subsequent simulation runs, you should select the Clean up simulation files check box available in the Simulation category of the Project Settings window to remove the files generated with the previous version of the Aldec simulator.
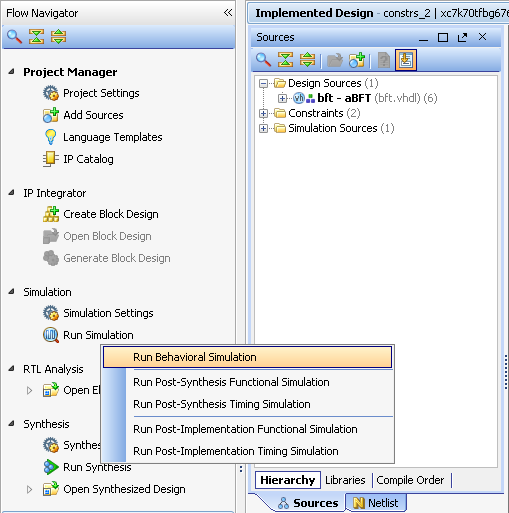
Now, click on the Run Simulation item from the Flow Navigator pane and select the type of simulation you want to run.
This will launch Active-HDL. Once opened, this process will create a workspace, design, and it will add all of your source files into the design. Vivado will generate DO macro scripts for compilation and simulation based upon the settings you provided in the above steps.
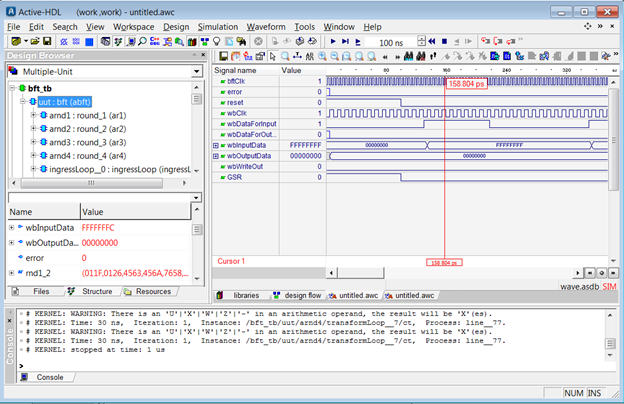
Active-HDL will start executing the automatically generated DO macro, and will launch the Waveform Viewer with simulation results loaded.
Corporate Headquarters
2260 Corporate Circle
Henderson, NV 89074 USA
Tel: +1 702 990 4400
Fax: +1 702 990 4414
https://www.aldec.com
©2026 Aldec, Inc.