Getting Started with Radiant
Introduction
This tutorial provides instructions for using Active-HDL in Radiant. Active-HDL is an integrated environment designed for development and verification of VHDL, Verilog, System Verilog, EDIF and System C based designs. In this tutorial we sample a Verilog design provided by Lattice Radiant to perform design entry and simulation.
Getting Started
You will first need to install Lattice Radiant Design Software and the latest version of Active-HDL on your computer to complete this tutorial. The free downloads are available here: Active-HDL and Lattice Radiant Software. You will then need to request a license to run the Raidant Design Software and request an Aldec license.
Creating Workspace and Design
At the start page of the Lattice Radiant Design Software, you will find different options. We will be creating a new project in this tutorial.
Click on New Project on Start page or go to File | New and click Project. The New Project Wizard starts.
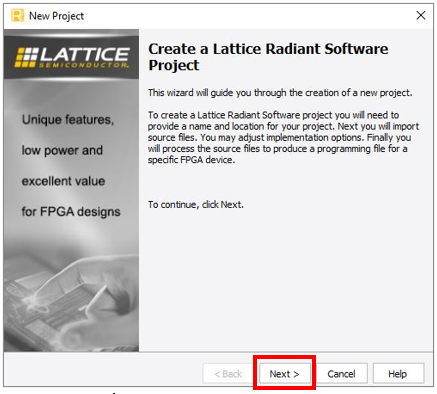
Figure 1: Create New Project
Click Next.
Provide the Project name and select the location where you want to save the project. (You may use the Browse button to designate the project directory). You can also select to create a subdirectory. Type in the Implementation name.
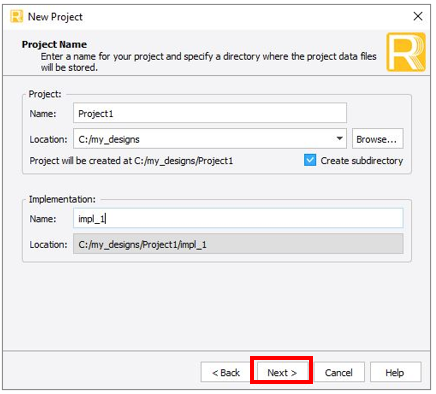
Figure 2: Create a New Project Wizard
Click Next.
If you have any source files select Add Source. (You can select to Copy source to implementation source directory and/or to Create empty constraint files).
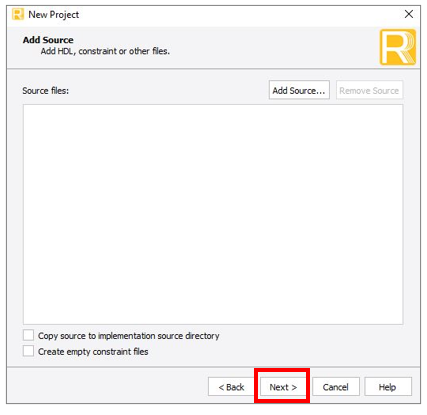
Figure 3: Add Source Files
Click Next.
Select Target Device.
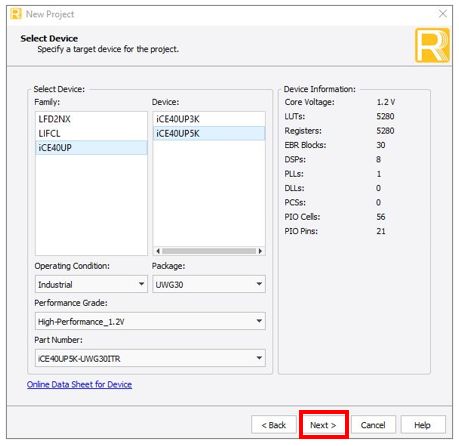
Figure 4: Specify Target Device
Click Next.
Select Synthesis Tool, click Lattice LSE for this tutorial.
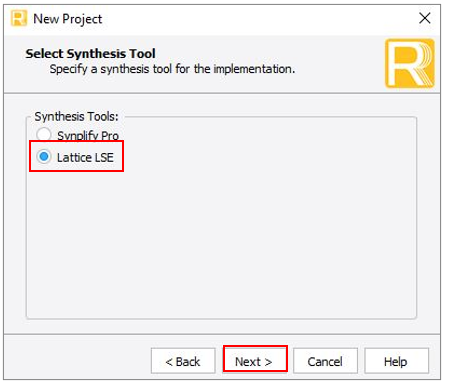
Figure 5: Select Synthesis Tool
Click Next.
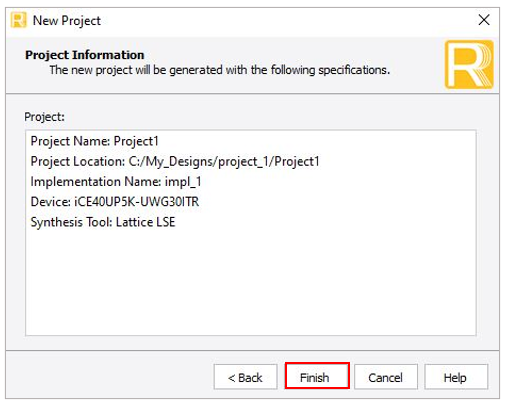
Figure 6: Project Information
Project information with the specifications that were previously selected will be displayed. If everything is correct, select Finish.
Creating/Adding Files to Design
A Project Summary that includes Reports and Resource Usage will be displayed. The Project Summary will also include panes which display the project's hierarchy, source files, and the console.
To create a new file or an existing file, right click Input Files and click Add and New File.

Figure 7: Add Files to Project
NOTE: You can also use File | New menu to add new files or to open existing files and save it to the design directory.
Creating HDL Source Code
Choose the desired source type, provide a name, and click New.
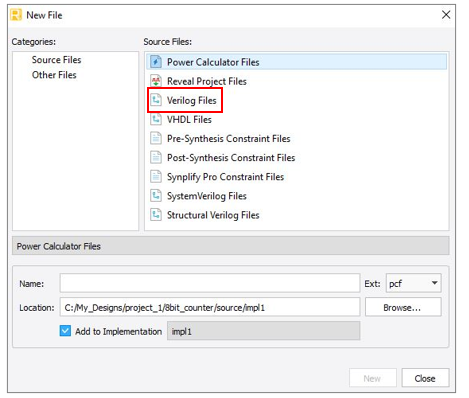
Figure 8: Creating a Source Code File
An editor window will open and will be ready for design entry.
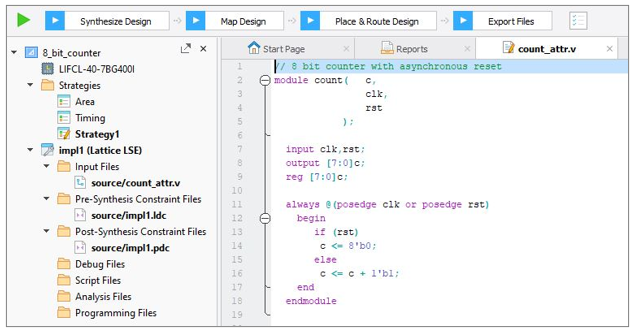
Figure 9: Source Code Window
Specify Path to Design
Add the path for ACTIVE_HDL (Aldec Simulator) by going to Tools | Options | Directories tab | Simulation.
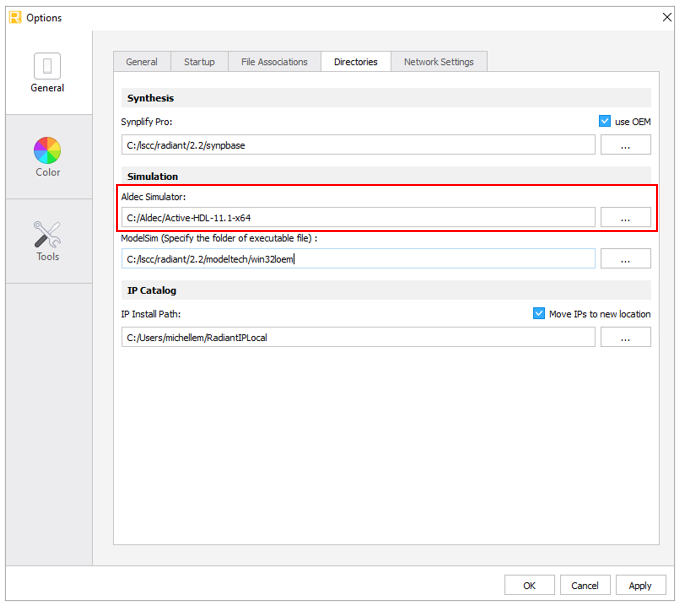
Figure 10: Active-HDL Path
Click Apply.
Click Next.
Simulation
To simulate design, go to Tools | Simulation Wizard

Figure 11: Simulation Wizard
Click Next.
Provide the Project Name and the project location using Browse. Select Active-HDL for Simulator and select the Process Stage.
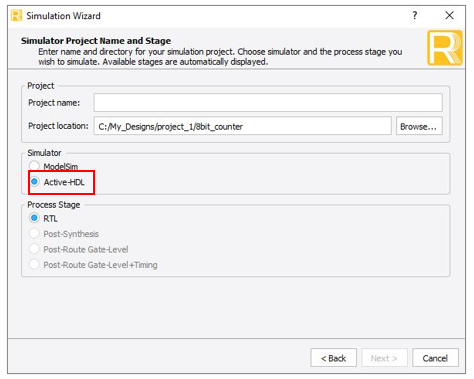
Figure 12: Simulator Project Name
Click Next.
Add and Reorder Source Files by using the arrows to organize files, you can also add or delete files.
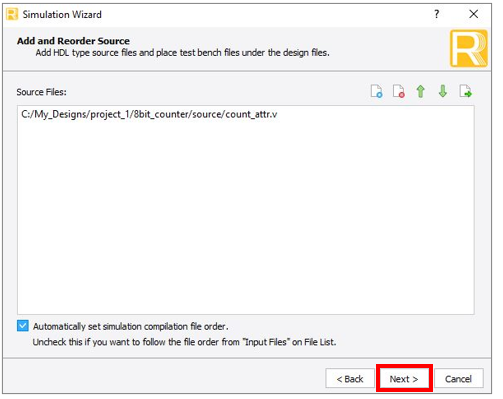
Figure 13: Add and Reorder Source Files
Click Next.
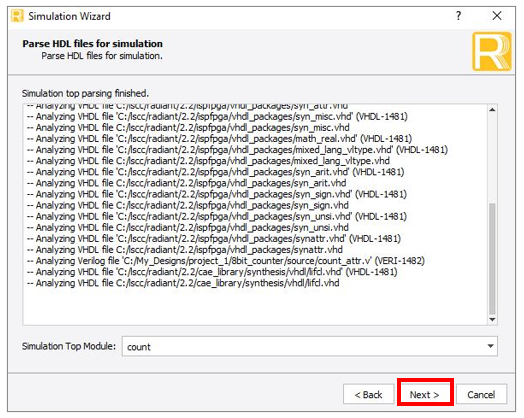
Figure 14: Parsing HDL Files
Parsing of HDL files occurs and once finished, click Next.
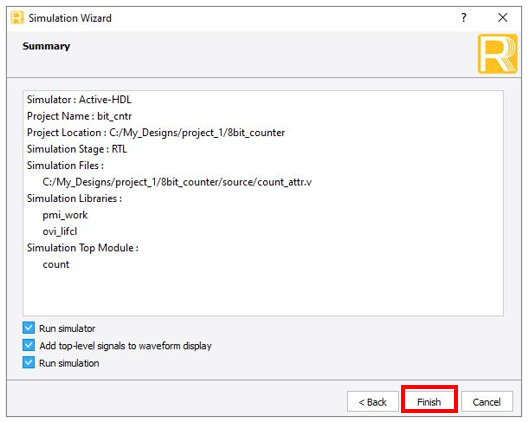
Figure 15: Summary
A summary is provided. Select back if any changes are needed otherwise, check the following options:
Check Run Simulator
Check Add top-level signals to waveform display
Check Run Simulation
Click Finish
Active-HDL
Next, Active-HDL will open up automatically and will display Design Browser, Waveform Viewer, and Console.
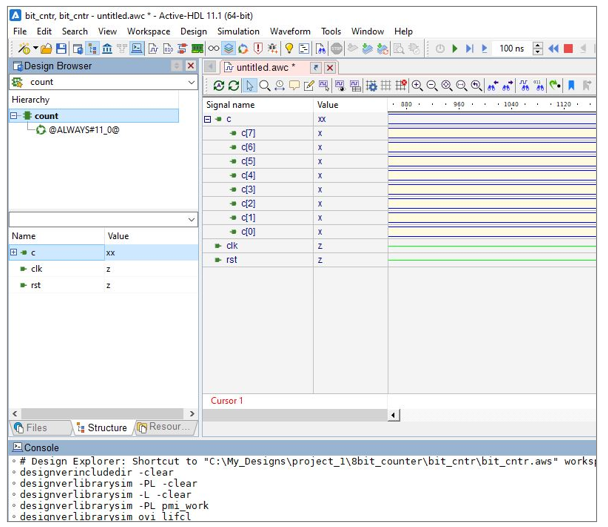
Figure 16: Active-HDL
Waveform Viewer
By default, the Accelerated Waveform Viewer is enabled and an *.asdb simulation database is created upon initialization of simulation. The Accelerated Waveform Viewer should be the preferred choice for designers working with large amounts of simulation data. It is optimized for large designs and long simulation runs.
Upon Active-HDL opening up, simulation has already started. However, you can run simulation for an unspecified amount of time by choosing Run from the Simulation menu.
To advance a simulation by a specific time step, set the desired time step in the Simulation Step box located in the main toolbar. Choose Run for from the Simulation menu or choose Run Until from the Simulation menu. Specify the desired time until a simulation should run and then click OK.

Figure 17: Run Simulation
PAUSE/End Simulation
To pause the simulation at the current simulation time, choose the Pause option from the Simulation menu.
To finish the simulation session, choose End Simulation from the Simulation menu.
You can restart the simulation, select Restart Simulation from the Simulation menu.
Saving the waveform file for off-liine viewing
You must stop the simulation before saving by clicking End Simulation from the Simulation menu.
When the simulation is finished or has run for the given time, you can save the waveform using File | Save menu.
HELP
Within the tool
Go to menu Help | Product Help to learn more about Active-HDL.
Help on web
Go to Aldec Support to access the online database and other technical documents about Active-HDL.
Support Account
Register or use your Aldec support account at www.aldec.com/support to open a support case or download the software.
Corporate Headquarters
2260 Corporate Circle
Henderson, NV 89074 USA
Tel: +1 702 990 4400
Fax: +1 702 990 4414
https://www.aldec.com
©2026 Aldec, Inc.