Using Agilent SystemVue® Co-Simulation Interface
Introduction
Agilent's SystemVue® is an environment for electronic system-level (ESL) design used by system architects and algorithm developers in physical layer designs of wireless, RF and DSP applications. The SystemVue Interface built-into Riviera-PRO provides the integration of the Agilent's simulation tools with Aldec’s HDL-based simulation environment for FPGA and ASIC designs. It enables co-simulation of algorithmic and hardware components of system-level design, addressing the needs of these professionals:
System engineers can troubleshoot Verilog and VHDL hardware implementations, while still maintaining a higher-level view of the physical layer of the system.
Hardware engineers can re-use SystemVue components in hardware simulations while respective HDL blocks are being coded, having the flexibility of successive replacement of algorithmic models describing the system with their target HDL equivalents without the need of rewriting the top-level testbench.
Running Co-Simulation with Riviera-PRO
The HDL co-simulation is just one of the steps of model-based FPGA verification flow. Please refer to following application note for details: http://cp.literature.agilent.com/litweb/pdf/5991-1113EN.pdf. This application note covers the HDL co-simulation flow represented in the following diagram. (The flow applies to HDL models that originate outside SystemVue; in contrast to using SystemVue’s built-in HDL code generation feature when the system automatically builds and loads the co-simulation models).

We will use the following sample design to demonstrate the co-simulation in action: http://www.aldec.com/downloads/private/340
Here is the typical sequence you would like to follow to run the HDL co-simulation:
Create Riviera-PRO workspace and add all HDL source files Please refer to the following link for detailed information about working with the workspace in Riviera-PRO: http://www.aldec.com/resources/manuals/Riviera-PRO/index.htm?open_page=wad_basicop.htm
Compile workspace in Riviera-PRO Right click on workspace and select the compile workspace option
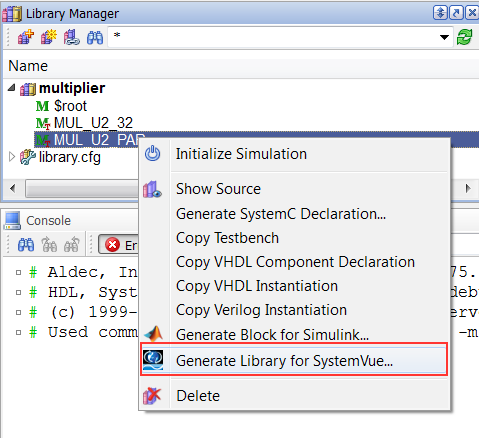
Generate Block Description File and xml library for SystemVue from Riviera-PRO This can be done using 2 approaches.
If you are using GUI for different actions then right click on compiled objects from library and select ‘Generate Library for SystemVue…’ option.
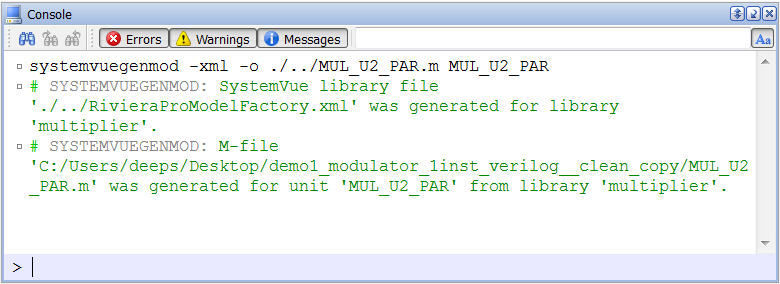
If using script then use ‘systemvuegenmod’ command to generate *.xml and *.m file. systemvuegenmod -xml -o ./../MUL_U2_PAR.m MUL_U2_PAR
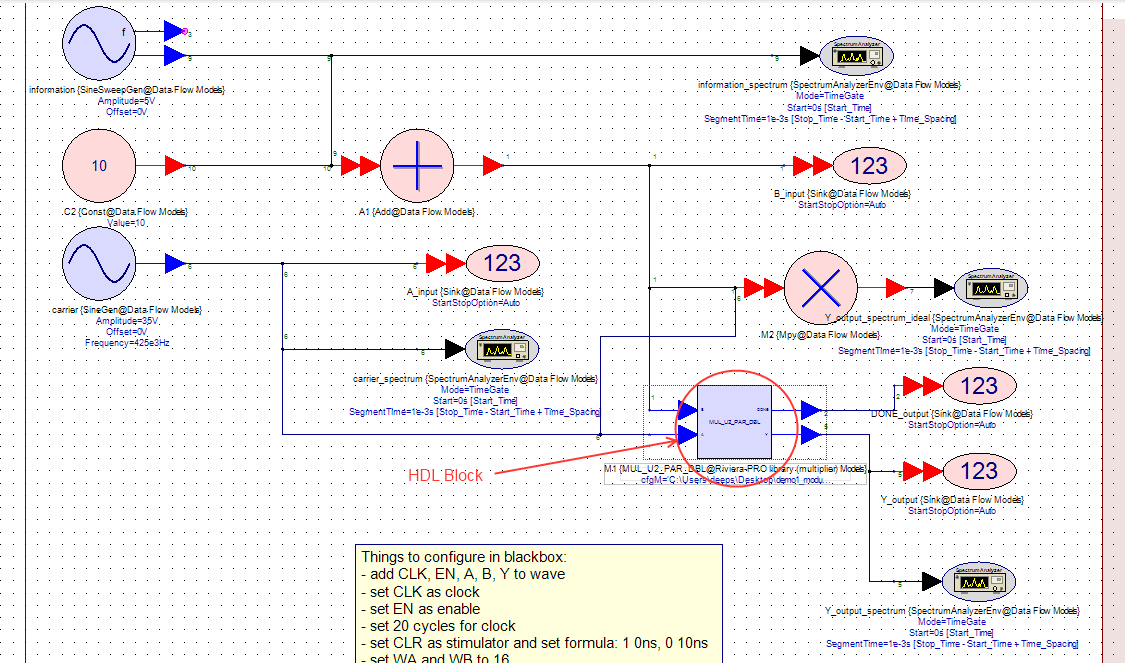
Now, open or create a workspace in SystemVue and create your schematic using different library components.
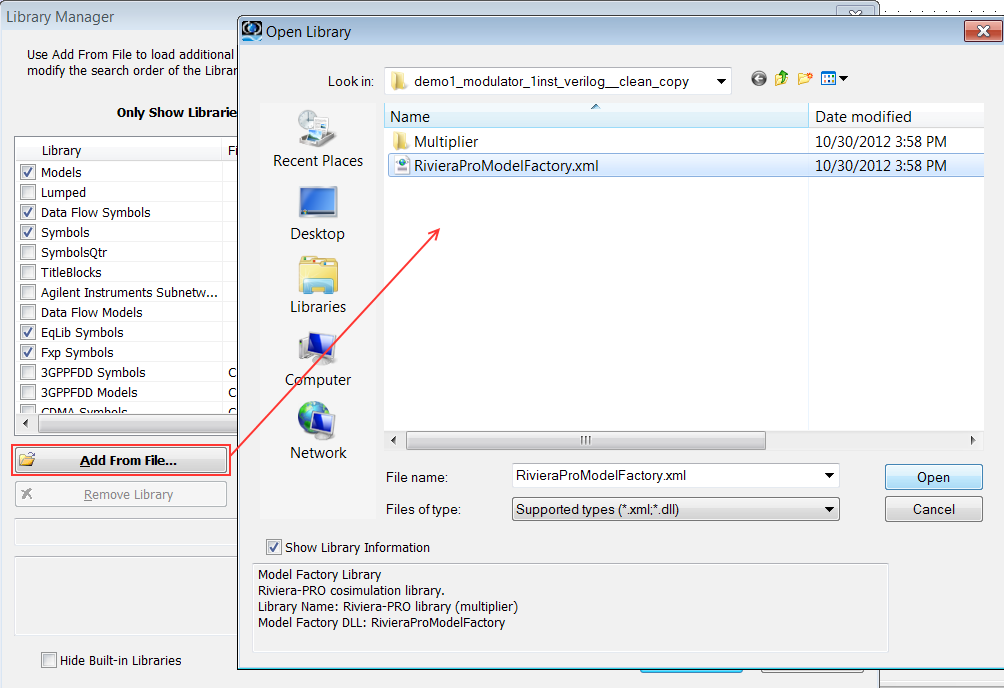
Open Library manager from Tools | Library Manager from SystemVue.
Click on Add from File… button and browse to the directory where you have stored the Riviera-PRO generated SystemVue library (*.xml file). Select this file, click open, and close the Library manager.
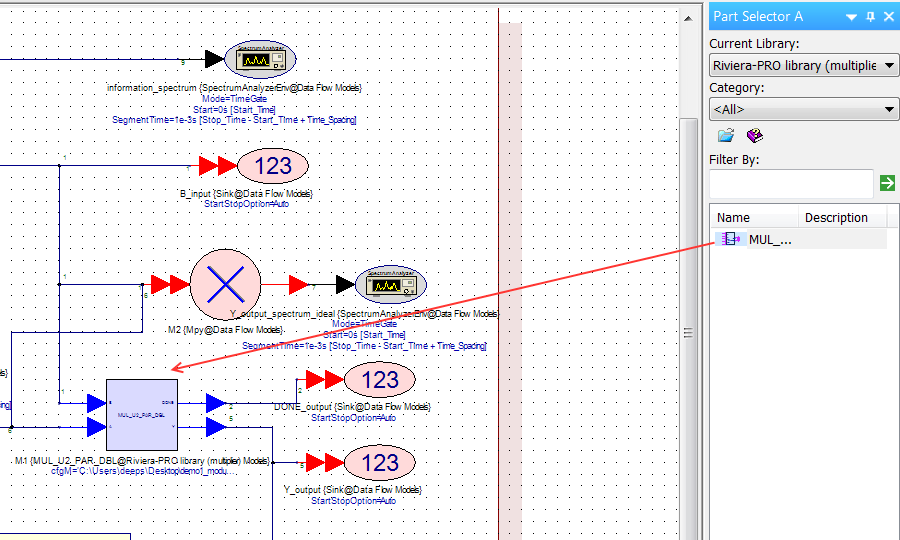
Add component (from newly added Riviera-PRO library) to your schematic design. To do so, just drag and drop component from the Part Selector window.
Right click on newly added component and select the properties… option. Here, select the proper block description file under Model category and click OK.
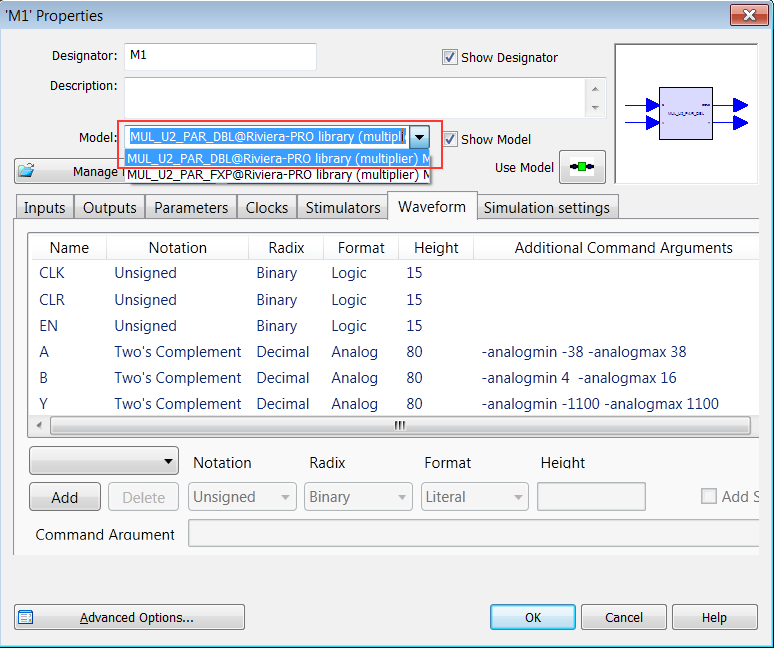
Make sure to set all settings based on your requirements and design from Inputs, Outputs, Parameters, Clocks, Simulators, Waveform and Simulation settings tabs. Please refer to readme.txt from the example design for detailed information regarding these parameters.
Press the Run button in SystemVue. Riviera-PRO starts automatically and starts performing co-simulation. Once simulation is finished you will be able to observe waveform in Riviera-PRO and SystemVue.
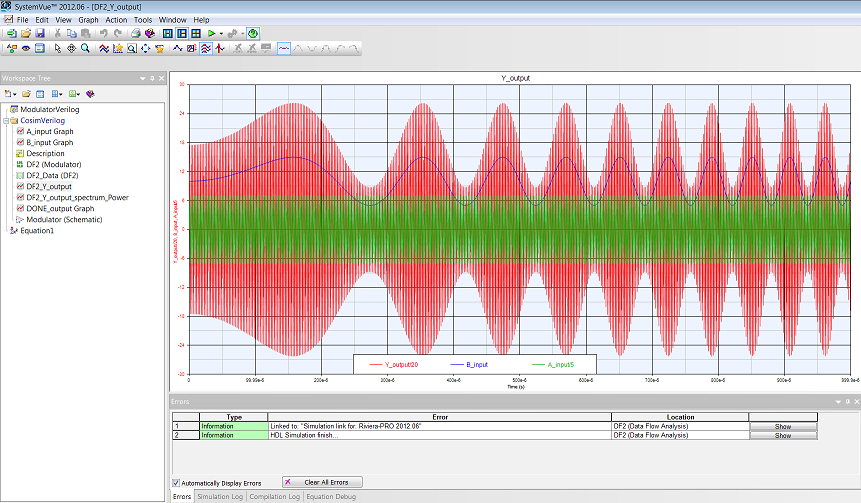
SystemVue waveform
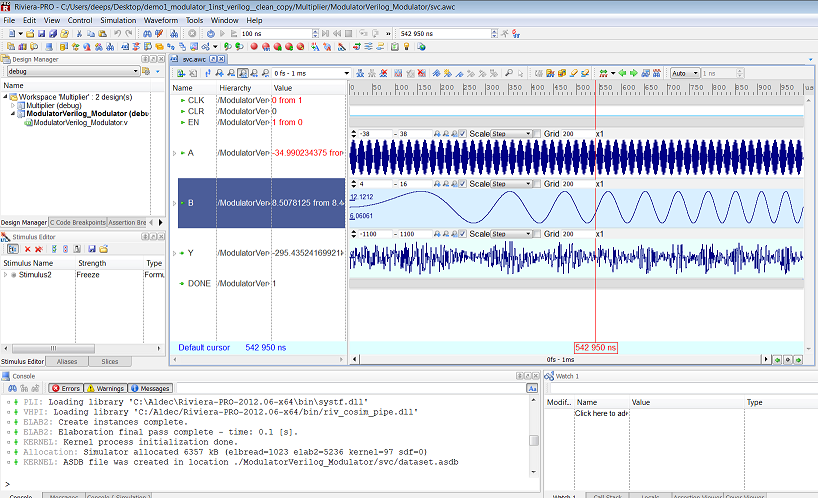
Riviera-PRO waveform
Highlighted Capabilities of the Interface
Riviera-PRO HDL co-simulation blocks can be used at algorithmic level (the co-simulation blocks can provide a floating-point interface, where the fixed-point conversion is done automatically inside the block).
For HDL files coming from outside SystemVue, Riviera-PRO features automatic generation of co-simulation block descriptions (.m files), which results in a much more efficient workflow compared to custom connection.
Just one license seat of Riviera-PRO is required per SystemVue diagram, as multiple instances of HDL co-simulation blocks require only one Riviera-PRO instance.
Ability to set breakpoints for HDL debugging from SystemVue block parameters.
Ability to override HDL co-simulation blocks generics from SystemVue.
Ability to add signals to Riviera-PRO waveform from SystemVue block parameters.
Ability to set clocking options, multiple synchronization signals, and to set a sampling rate within Riviera-PRO co-simulation blocks.
Riviera-PRO is able to accommodate discrete time in SystemVue flows.
Conclusion
Using Riviera-PRO SystemVue interface one can perform hardware (HDL) and software (algorithmic) co-simulation without leaving the native SystemVue environment and can still have ability to control and debug HDL side of co-simulation. With this interface one can start performing hardware simulation using algorithmic models in early stages while other blocks are still in HDL development phase. Floating and fixed point simulation can be performed and results can be analyzed in SystemVue and in Riviera-PRO using advanced waveform viewer.
Required Software
Riviera-PRO 2012.06 or later
SystemVue 2012.06 or later
Corporate Headquarters
2260 Corporate Circle
Henderson, NV 89074 USA
Tel: +1 702 990 4400
Fax: +1 702 990 4414
https://www.aldec.com
©2026 Aldec, Inc.