SVN Installation and Use with Active-HDL Source Revision Control
Overview
Active-HDL has the built-in mechanism to interface as a client with the most popular revision control systems such as SVN. In this application note we will install and use the following revision control software:
CollabNet Subversion
TortoiseSVN
CollabNet Subversion as an SVN server software. TortoiseSVN is a standalone SVN client that augments Active-HDL's client capabilities.
Note: CollabNet and Tortoise software mentioned in this application note are free.
Installing SVN Server from CollabNet
To get CollabNet Subversion Server go to http://www.collab.net/downloads/subversion and download the latest version of CollabNet Subversion Edge software.
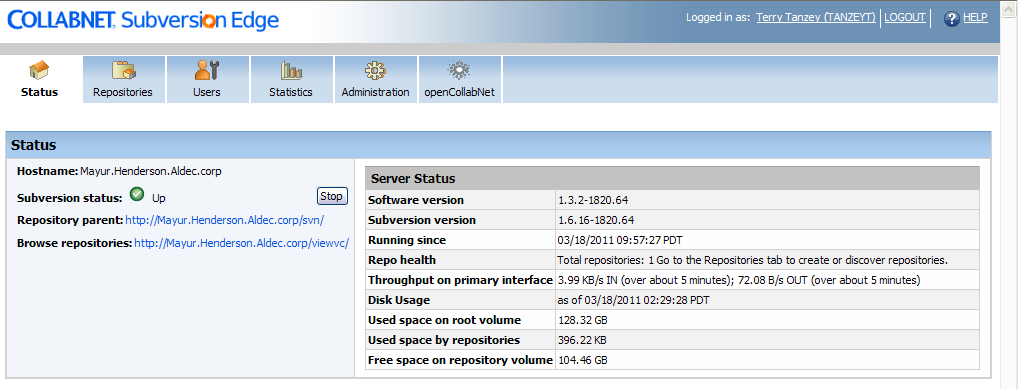
Install and start CollabNet Subversion Edge as per CollabNet's documentation. The end result should be as shown below.
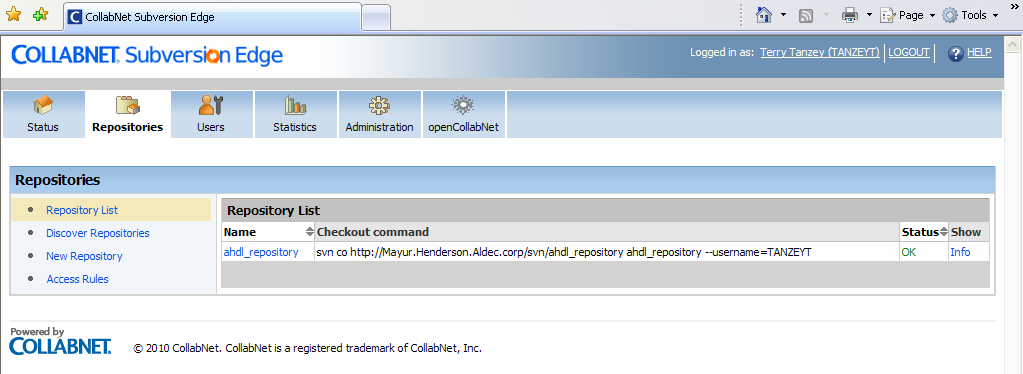
Create a repository like what is shown below.
Install SVN client from Tortoise
Go to http://tortoisesvn.net/downloads.html and choose either the 32-bit version or 64-bit version depending upon the type of computer used.
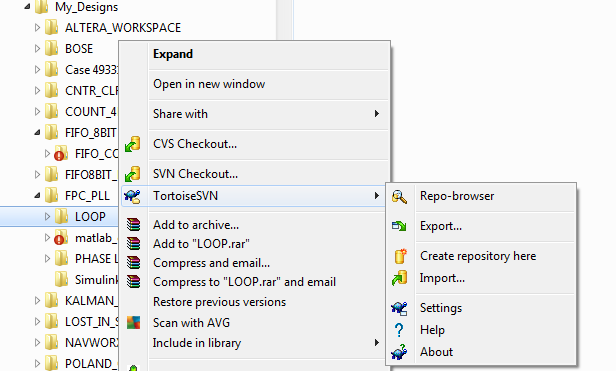
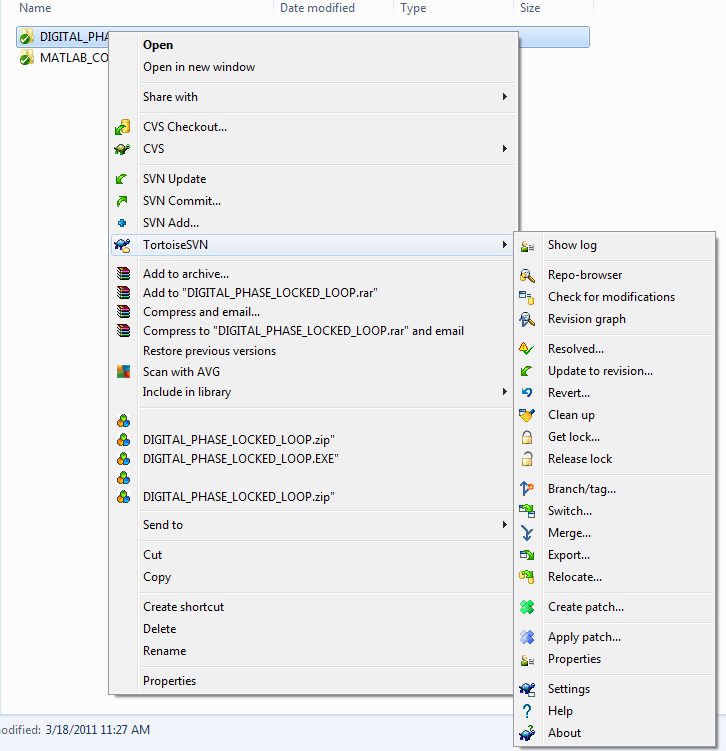
Install the TortoiseSVN software. Open the Windows Explorer program and right-click to see the SVN options as shown below.
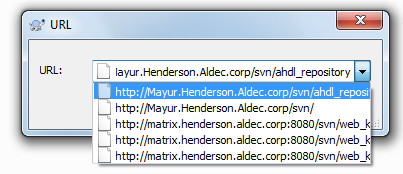
Configure TortoiseSVN to point to the location of the repository. For this right click on any folder in the file Explorer and bring up Tortoise’s Repo-browser. Right-click on it to bring up the URL-field. Set the URL field of Repo-browser to point to the link to the repository that was created earlier in CollabNet, like the example below shows.
More options will appear once a folder is under SVN version control. This will be explained later from within Active-HDL, but for now familiarize yourself with the screen shot below which covers all the options of TortoiseSVN.
Integrating Active-HDL with Tortoise's tools
There are 3 batch files that must be created and placed in the C:/Aldec/Active-HDL/BIN subfolder
tortoisediff.bat with the following content
start TortoiseProc.exe /command:diff /path:%1
tortoisereprobrowser.bat with the following content
start TortoiseProc.exe /command:repobrowser
tortoiserevisiongraph.bat with the following content
start TortoiseProc.exe /command:revisiongraph /path:%1
Configuring Source Control in Active-HDL
Open Active-HDL and click on menu Tools | Preferences | Source Control | Setup and click the Register Provider button and select the SVN option as shown below.
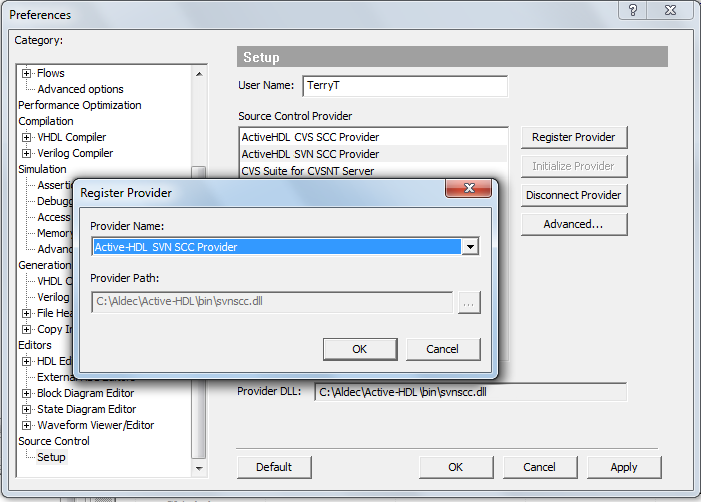
Click OK when done.
Highlight Active-HDL SVN SCC Provider
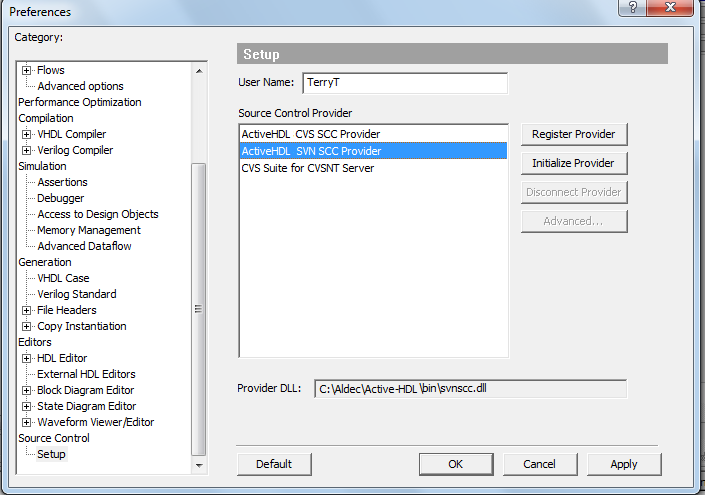
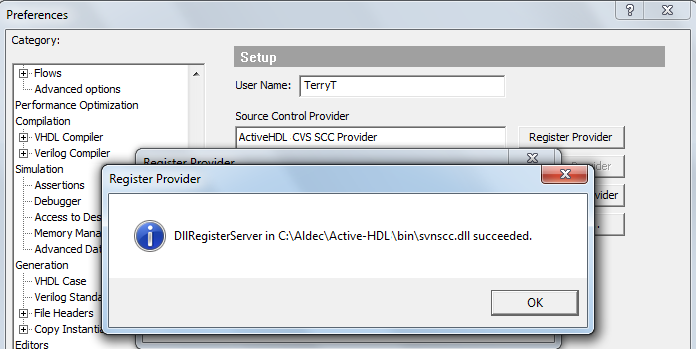
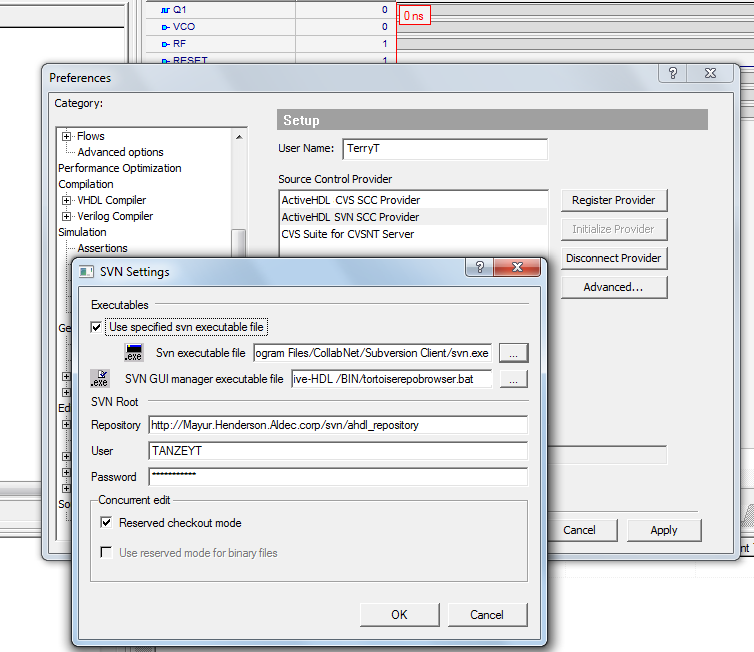
Click the Initialize Provider button, then Advanced button and choose the SVN option C:/Program Files/CollabNet/Subversion Client/svn.exe as shown below.
Note: For SVN GUI Manager you may use Tortoise Repo-Browser and include the batch file from the path C:/ALDEC/Active-HDL/BIN/tortoiserepobrowser.bat as shown below.
Click OK when done.
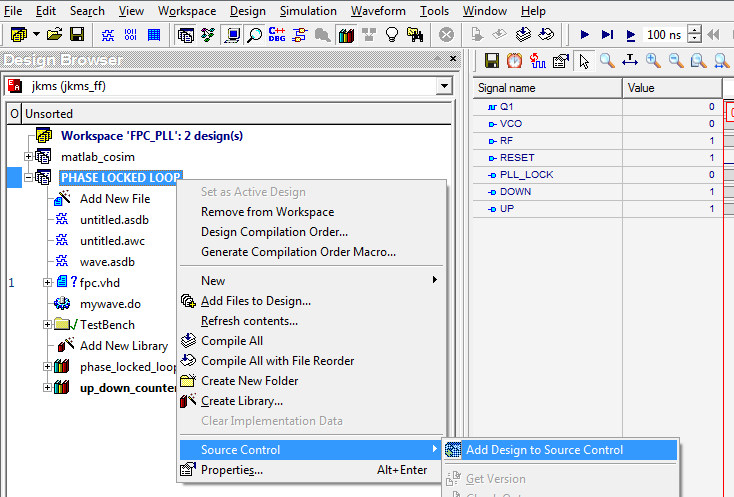
Adding an Active-HDL design to SVN
Open any design, select it on Design Browser, right-click on the design and select Source Control | Add design to Source Control as shown below.
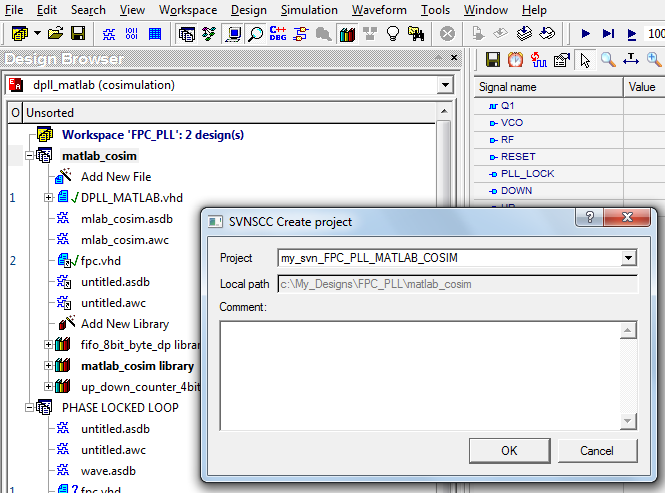
Click OK when done and observe the console output.
Importing Active-HDL project from SVN
Choose from menu bar: File | Open Workspace/Design Explorer and within Workspace/Design Explorer choose: File | Open Design from Source Control as shown below.
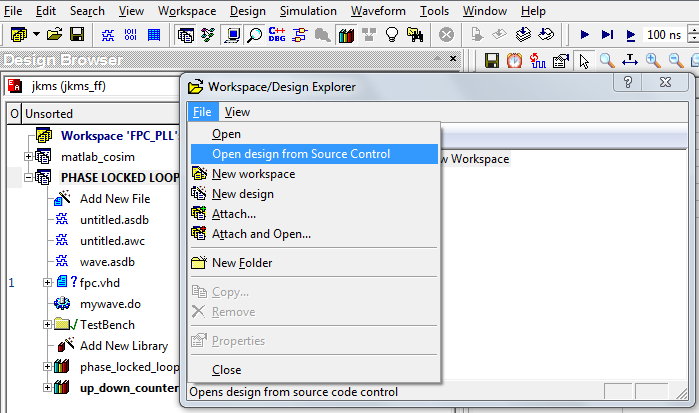
Select the SVNSCC Open Project like the example shown below.
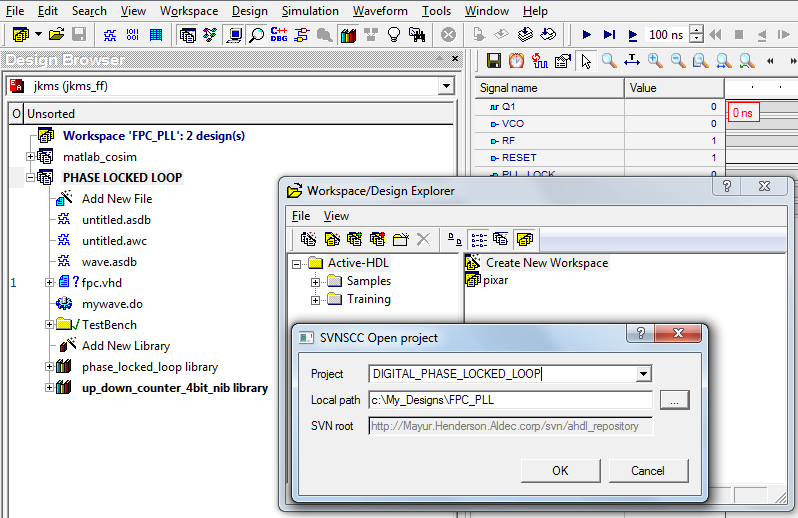
Click OK when done.
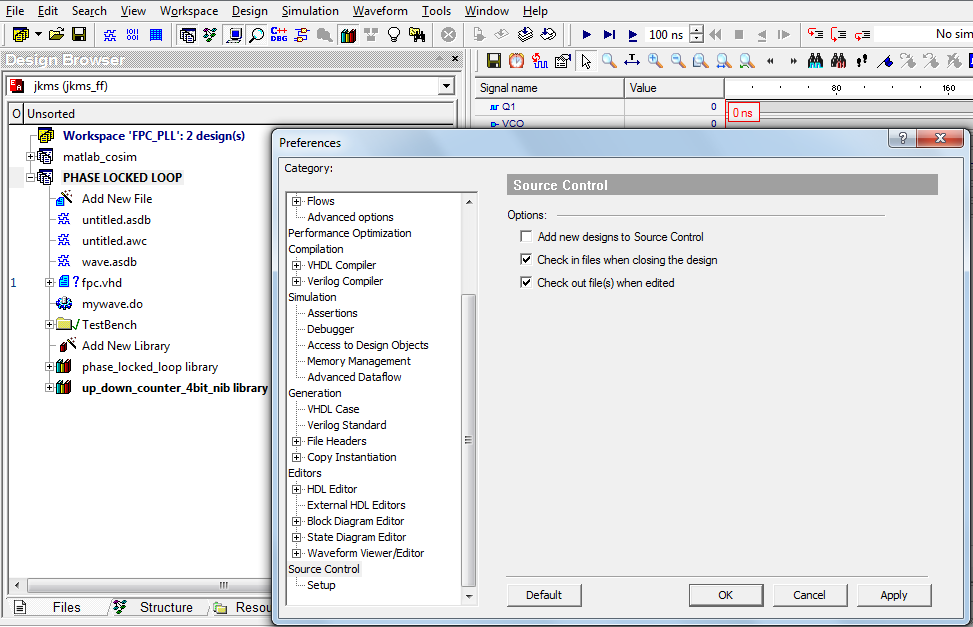
Updating SVN repository
Go to menu Tools | Preferences | Source Control and select Check in Files when closing the design as shown below. Hence the appropriate source files will be automatically checked-out when edited and checked-in when Active-HDL is closed.
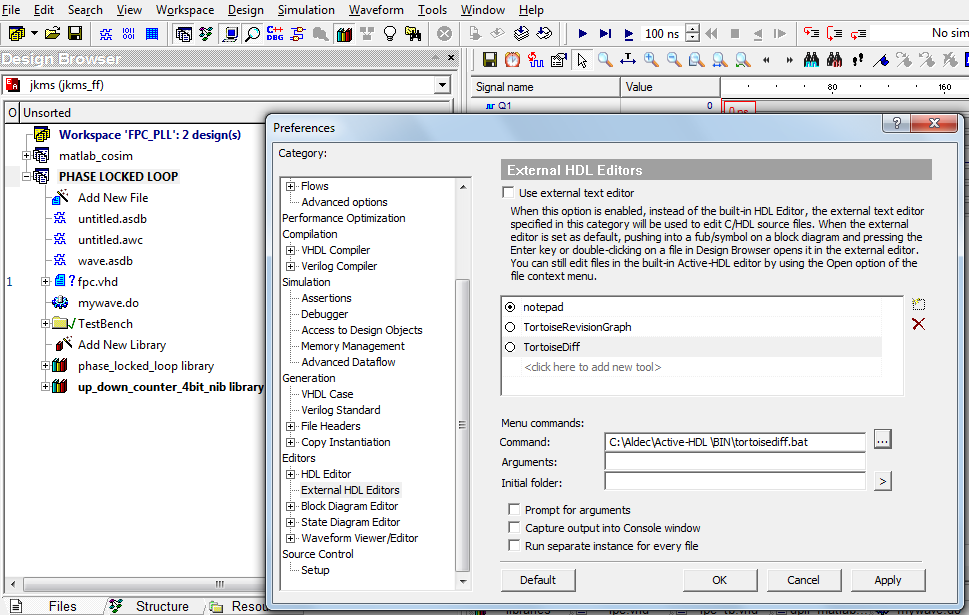
Set additional Tortoise Tools in Active-HDL (optional)
You may configure Active-HDL to call Tortoise's tools using External HDL Editors option. To do that open menu Tools | Preferences | Editors | External HDL Editors and define two new tools: TortoiseRevisionGraph and TortoiseDiff pointing to the respective batch files that you were advised to create above.
Click OK when done.
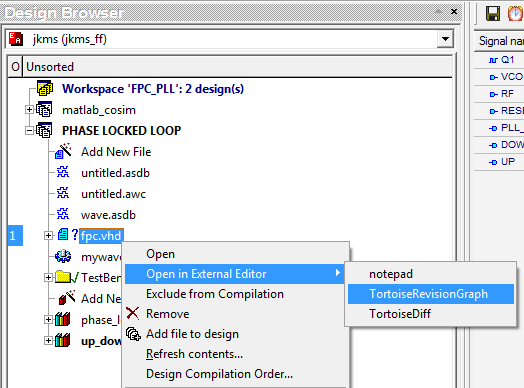
Invoke them with the selected file directly from Active-HDL's Design Browser by right-clicking and selecting the desired choice as shown below.
Corporate Headquarters
2260 Corporate Circle
Henderson, NV 89074 USA
Tel: +1 702 990 4400
Fax: +1 702 990 4414
https://www.aldec.com
©2026 Aldec, Inc.